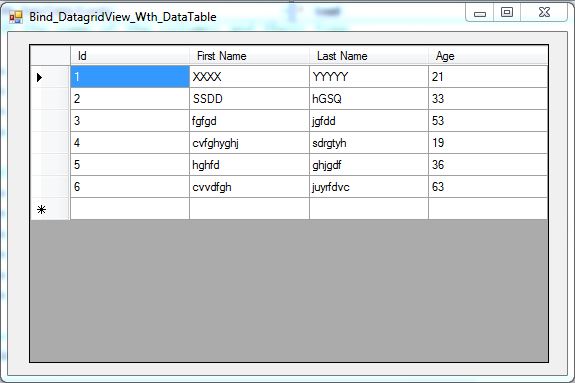
JAVA - How To Add A Row To JTable From JTextfields in Java
JAVA - How To Add A Row To JTable Using JTextfields In Java NetBeans
________________________________________________________________________
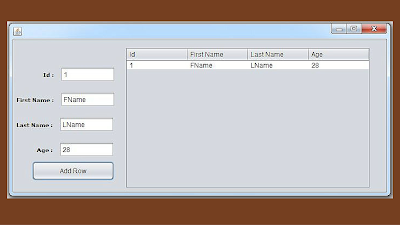
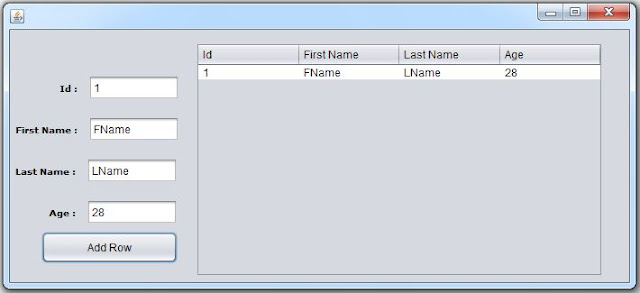
In This Java Code We Will See How To Insert A Row In JTable From JTextfield In Java Programming Language.
*Java Courses : Java Complete Course
Java Swing Course
package java_tutorials;
import javax.swing.table.DefaultTableModel;
/**
* @author 1bestcsharp.blogspot.com
*/
public class Java_JTable_Add_Row_Using_TextBoxes extends javax.swing.JFrame {
/**
* Creates new form Java_JTable_Add_Row_Using_TextBoxes
*/
public Java_JTable_Add_Row_Using_TextBoxes() {
initComponents();
}
@SuppressWarnings("unchecked")
// <editor-fold defaultstate="collapsed" desc="Generated Code">
private void initComponents() {
jLabel1 = new javax.swing.JLabel();
jLabel2 = new javax.swing.JLabel();
jLabel3 = new javax.swing.JLabel();
jLabel4 = new javax.swing.JLabel();
jTextFieldID = new javax.swing.JTextField();
jTextFieldFN = new javax.swing.JTextField();
jTextFieldLN = new javax.swing.JTextField();
jTextFieldAGE = new javax.swing.JTextField();
btnAddRow = new javax.swing.JButton();
jScrollPane1 = new javax.swing.JScrollPane();
jTable1 = new javax.swing.JTable();
setDefaultCloseOperation(javax.swing.WindowConstants.EXIT_ON_CLOSE);
jLabel1.setFont(new java.awt.Font("Verdana", 1, 10)); // NOI18N
jLabel1.setText("Id :");
jLabel2.setFont(new java.awt.Font("Verdana", 1, 10)); // NOI18N
jLabel2.setText("First Name :");
jLabel3.setFont(new java.awt.Font("Verdana", 1, 10)); // NOI18N
jLabel3.setText("Last Name :");
jLabel4.setFont(new java.awt.Font("Verdana", 1, 10)); // NOI18N
jLabel4.setText("Age :");
btnAddRow.setText("Add Row");
btnAddRow.addActionListener(new java.awt.event.ActionListener() {
public void actionPerformed(java.awt.event.ActionEvent evt) {
btnAddRowActionPerformed(evt);
}
});
jTable1.setModel(new javax.swing.table.DefaultTableModel(
new Object [][] {
},
new String [] {
"Id", "First Name", "Last Name", "Age"
}
));
jScrollPane1.setViewportView(jTable1);
javax.swing.GroupLayout layout = new javax.swing.GroupLayout(getContentPane());
getContentPane().setLayout(layout);
layout.setHorizontalGroup(
layout.createParallelGroup(javax.swing.GroupLayout.Alignment.LEADING)
.addGroup(layout.createSequentialGroup()
.addContainerGap()
.addGroup(layout.createParallelGroup(javax.swing.GroupLayout.Alignment.LEADING)
.addGroup(layout.createParallelGroup(javax.swing.GroupLayout.Alignment.TRAILING)
.addGroup(layout.createSequentialGroup()
.addComponent(jLabel1)
.addPreferredGap(javax.swing.LayoutStyle.ComponentPlacement.UNRELATED)
.addComponent(jTextFieldID, javax.swing.GroupLayout.PREFERRED_SIZE, 101, javax.swing.GroupLayout.PREFERRED_SIZE))
.addGroup(javax.swing.GroupLayout.Alignment.LEADING, layout.createSequentialGroup()
.addComponent(jLabel2)
.addPreferredGap(javax.swing.LayoutStyle.ComponentPlacement.UNRELATED)
.addComponent(jTextFieldFN, javax.swing.GroupLayout.PREFERRED_SIZE, 101, javax.swing.GroupLayout.PREFERRED_SIZE)))
.addGroup(layout.createParallelGroup(javax.swing.GroupLayout.Alignment.TRAILING)
.addComponent(btnAddRow, javax.swing.GroupLayout.PREFERRED_SIZE, 151, javax.swing.GroupLayout.PREFERRED_SIZE)
.addGroup(javax.swing.GroupLayout.Alignment.LEADING, layout.createSequentialGroup()
.addGroup(layout.createParallelGroup(javax.swing.GroupLayout.Alignment.TRAILING)
.addComponent(jLabel3)
.addComponent(jLabel4))
.addPreferredGap(javax.swing.LayoutStyle.ComponentPlacement.UNRELATED)
.addGroup(layout.createParallelGroup(javax.swing.GroupLayout.Alignment.LEADING)
.addComponent(jTextFieldAGE, javax.swing.GroupLayout.PREFERRED_SIZE, 101, javax.swing.GroupLayout.PREFERRED_SIZE)
.addComponent(jTextFieldLN, javax.swing.GroupLayout.PREFERRED_SIZE, 101, javax.swing.GroupLayout.PREFERRED_SIZE)))))
.addGap(18, 18, 18)
.addComponent(jScrollPane1, javax.swing.GroupLayout.PREFERRED_SIZE, 452, javax.swing.GroupLayout.PREFERRED_SIZE)
.addContainerGap(29, Short.MAX_VALUE))
);
layout.setVerticalGroup(
layout.createParallelGroup(javax.swing.GroupLayout.Alignment.LEADING)
.addGroup(layout.createSequentialGroup()
.addGap(50, 50, 50)
.addGroup(layout.createParallelGroup(javax.swing.GroupLayout.Alignment.BASELINE)
.addComponent(jLabel1, javax.swing.GroupLayout.PREFERRED_SIZE, 23, javax.swing.GroupLayout.PREFERRED_SIZE)
.addComponent(jTextFieldID, javax.swing.GroupLayout.PREFERRED_SIZE, javax.swing.GroupLayout.DEFAULT_SIZE, javax.swing.GroupLayout.PREFERRED_SIZE))
.addGap(18, 18, 18)
.addGroup(layout.createParallelGroup(javax.swing.GroupLayout.Alignment.BASELINE)
.addComponent(jLabel2, javax.swing.GroupLayout.PREFERRED_SIZE, 23, javax.swing.GroupLayout.PREFERRED_SIZE)
.addComponent(jTextFieldFN, javax.swing.GroupLayout.PREFERRED_SIZE, javax.swing.GroupLayout.DEFAULT_SIZE, javax.swing.GroupLayout.PREFERRED_SIZE))
.addGap(18, 18, 18)
.addGroup(layout.createParallelGroup(javax.swing.GroupLayout.Alignment.BASELINE)
.addComponent(jLabel3, javax.swing.GroupLayout.PREFERRED_SIZE, 23, javax.swing.GroupLayout.PREFERRED_SIZE)
.addComponent(jTextFieldLN, javax.swing.GroupLayout.PREFERRED_SIZE, javax.swing.GroupLayout.DEFAULT_SIZE, javax.swing.GroupLayout.PREFERRED_SIZE))
.addGap(18, 18, 18)
.addGroup(layout.createParallelGroup(javax.swing.GroupLayout.Alignment.BASELINE)
.addComponent(jLabel4, javax.swing.GroupLayout.PREFERRED_SIZE, 23, javax.swing.GroupLayout.PREFERRED_SIZE)
.addComponent(jTextFieldAGE, javax.swing.GroupLayout.PREFERRED_SIZE, javax.swing.GroupLayout.DEFAULT_SIZE, javax.swing.GroupLayout.PREFERRED_SIZE))
.addPreferredGap(javax.swing.LayoutStyle.ComponentPlacement.RELATED, javax.swing.GroupLayout.DEFAULT_SIZE, Short.MAX_VALUE)
.addComponent(btnAddRow, javax.swing.GroupLayout.PREFERRED_SIZE, 35, javax.swing.GroupLayout.PREFERRED_SIZE)
.addGap(21, 21, 21))
.addGroup(javax.swing.GroupLayout.Alignment.TRAILING, layout.createSequentialGroup()
.addContainerGap(14, Short.MAX_VALUE)
.addComponent(jScrollPane1, javax.swing.GroupLayout.PREFERRED_SIZE, 260, javax.swing.GroupLayout.PREFERRED_SIZE)
.addContainerGap())
);
pack();
}// </editor-fold>
// button to add the row to the jtable
private void btnAddRowActionPerformed(java.awt.event.ActionEvent evt) {
// get the model from the jtable
DefaultTableModel model = (DefaultTableModel)jTable1.getModel();
// insert row to the model from jtextfields using addRow method
model.addRow(new Object[]{jTextFieldID.getText(), jTextFieldFN.getText(),
jTextFieldLN.getText(), jTextFieldAGE.getText()});
}
/**
* @param args the command line arguments
*/
public static void main(String args[]) {
try {
for (javax.swing.UIManager.LookAndFeelInfo info : javax.swing.UIManager.getInstalledLookAndFeels()) {
if ("Nimbus".equals(info.getName())) {
javax.swing.UIManager.setLookAndFeel(info.getClassName());
break;
}
}
} catch (ClassNotFoundException ex) {
java.util.logging.Logger.getLogger(Java_JTable_Add_Row_Using_TextBoxes.class.getName()).log(java.util.logging.Level.SEVERE, null, ex);
} catch (InstantiationException ex) {
java.util.logging.Logger.getLogger(Java_JTable_Add_Row_Using_TextBoxes.class.getName()).log(java.util.logging.Level.SEVERE, null, ex);
} catch (IllegalAccessException ex) {
java.util.logging.Logger.getLogger(Java_JTable_Add_Row_Using_TextBoxes.class.getName()).log(java.util.logging.Level.SEVERE, null, ex);
} catch (javax.swing.UnsupportedLookAndFeelException ex) {
java.util.logging.Logger.getLogger(Java_JTable_Add_Row_Using_TextBoxes.class.getName()).log(java.util.logging.Level.SEVERE, null, ex);
}
//</editor-fold>
/* Create and display the form */
java.awt.EventQueue.invokeLater(new Runnable() {
public void run() {
new Java_JTable_Add_Row_Using_TextBoxes().setVisible(true);
}
});
}
// Variables declaration - do not modify
private javax.swing.JButton btnAddRow;
private javax.swing.JLabel jLabel1;
private javax.swing.JLabel jLabel2;
private javax.swing.JLabel jLabel3;
private javax.swing.JLabel jLabel4;
private javax.swing.JScrollPane jScrollPane1;
private javax.swing.JTable jTable1;
private javax.swing.JTextField jTextFieldAGE;
private javax.swing.JTextField jTextFieldFN;
private javax.swing.JTextField jTextFieldID;
private javax.swing.JTextField jTextFieldLN;
// End of variables declaration
}
Another Source Code:
In This Java Code We Will See How To Insert A Row In JTable From JTextfield In Java Programming Language.
*Java Courses : Java Complete Course
Java Swing Course
Source Code:
package java_tutorials;
import javax.swing.table.DefaultTableModel;
/**
* @author 1bestcsharp.blogspot.com
*/
public class Java_JTable_Add_Row_Using_TextBoxes extends javax.swing.JFrame {
/**
* Creates new form Java_JTable_Add_Row_Using_TextBoxes
*/
public Java_JTable_Add_Row_Using_TextBoxes() {
initComponents();
}
@SuppressWarnings("unchecked")
// <editor-fold defaultstate="collapsed" desc="Generated Code">
private void initComponents() {
jLabel1 = new javax.swing.JLabel();
jLabel2 = new javax.swing.JLabel();
jLabel3 = new javax.swing.JLabel();
jLabel4 = new javax.swing.JLabel();
jTextFieldID = new javax.swing.JTextField();
jTextFieldFN = new javax.swing.JTextField();
jTextFieldLN = new javax.swing.JTextField();
jTextFieldAGE = new javax.swing.JTextField();
btnAddRow = new javax.swing.JButton();
jScrollPane1 = new javax.swing.JScrollPane();
jTable1 = new javax.swing.JTable();
setDefaultCloseOperation(javax.swing.WindowConstants.EXIT_ON_CLOSE);
jLabel1.setFont(new java.awt.Font("Verdana", 1, 10)); // NOI18N
jLabel1.setText("Id :");
jLabel2.setFont(new java.awt.Font("Verdana", 1, 10)); // NOI18N
jLabel2.setText("First Name :");
jLabel3.setFont(new java.awt.Font("Verdana", 1, 10)); // NOI18N
jLabel3.setText("Last Name :");
jLabel4.setFont(new java.awt.Font("Verdana", 1, 10)); // NOI18N
jLabel4.setText("Age :");
btnAddRow.setText("Add Row");
btnAddRow.addActionListener(new java.awt.event.ActionListener() {
public void actionPerformed(java.awt.event.ActionEvent evt) {
btnAddRowActionPerformed(evt);
}
});
jTable1.setModel(new javax.swing.table.DefaultTableModel(
new Object [][] {
},
new String [] {
"Id", "First Name", "Last Name", "Age"
}
));
jScrollPane1.setViewportView(jTable1);
javax.swing.GroupLayout layout = new javax.swing.GroupLayout(getContentPane());
getContentPane().setLayout(layout);
layout.setHorizontalGroup(
layout.createParallelGroup(javax.swing.GroupLayout.Alignment.LEADING)
.addGroup(layout.createSequentialGroup()
.addContainerGap()
.addGroup(layout.createParallelGroup(javax.swing.GroupLayout.Alignment.LEADING)
.addGroup(layout.createParallelGroup(javax.swing.GroupLayout.Alignment.TRAILING)
.addGroup(layout.createSequentialGroup()
.addComponent(jLabel1)
.addPreferredGap(javax.swing.LayoutStyle.ComponentPlacement.UNRELATED)
.addComponent(jTextFieldID, javax.swing.GroupLayout.PREFERRED_SIZE, 101, javax.swing.GroupLayout.PREFERRED_SIZE))
.addGroup(javax.swing.GroupLayout.Alignment.LEADING, layout.createSequentialGroup()
.addComponent(jLabel2)
.addPreferredGap(javax.swing.LayoutStyle.ComponentPlacement.UNRELATED)
.addComponent(jTextFieldFN, javax.swing.GroupLayout.PREFERRED_SIZE, 101, javax.swing.GroupLayout.PREFERRED_SIZE)))
.addGroup(layout.createParallelGroup(javax.swing.GroupLayout.Alignment.TRAILING)
.addComponent(btnAddRow, javax.swing.GroupLayout.PREFERRED_SIZE, 151, javax.swing.GroupLayout.PREFERRED_SIZE)
.addGroup(javax.swing.GroupLayout.Alignment.LEADING, layout.createSequentialGroup()
.addGroup(layout.createParallelGroup(javax.swing.GroupLayout.Alignment.TRAILING)
.addComponent(jLabel3)
.addComponent(jLabel4))
.addPreferredGap(javax.swing.LayoutStyle.ComponentPlacement.UNRELATED)
.addGroup(layout.createParallelGroup(javax.swing.GroupLayout.Alignment.LEADING)
.addComponent(jTextFieldAGE, javax.swing.GroupLayout.PREFERRED_SIZE, 101, javax.swing.GroupLayout.PREFERRED_SIZE)
.addComponent(jTextFieldLN, javax.swing.GroupLayout.PREFERRED_SIZE, 101, javax.swing.GroupLayout.PREFERRED_SIZE)))))
.addGap(18, 18, 18)
.addComponent(jScrollPane1, javax.swing.GroupLayout.PREFERRED_SIZE, 452, javax.swing.GroupLayout.PREFERRED_SIZE)
.addContainerGap(29, Short.MAX_VALUE))
);
layout.setVerticalGroup(
layout.createParallelGroup(javax.swing.GroupLayout.Alignment.LEADING)
.addGroup(layout.createSequentialGroup()
.addGap(50, 50, 50)
.addGroup(layout.createParallelGroup(javax.swing.GroupLayout.Alignment.BASELINE)
.addComponent(jLabel1, javax.swing.GroupLayout.PREFERRED_SIZE, 23, javax.swing.GroupLayout.PREFERRED_SIZE)
.addComponent(jTextFieldID, javax.swing.GroupLayout.PREFERRED_SIZE, javax.swing.GroupLayout.DEFAULT_SIZE, javax.swing.GroupLayout.PREFERRED_SIZE))
.addGap(18, 18, 18)
.addGroup(layout.createParallelGroup(javax.swing.GroupLayout.Alignment.BASELINE)
.addComponent(jLabel2, javax.swing.GroupLayout.PREFERRED_SIZE, 23, javax.swing.GroupLayout.PREFERRED_SIZE)
.addComponent(jTextFieldFN, javax.swing.GroupLayout.PREFERRED_SIZE, javax.swing.GroupLayout.DEFAULT_SIZE, javax.swing.GroupLayout.PREFERRED_SIZE))
.addGap(18, 18, 18)
.addGroup(layout.createParallelGroup(javax.swing.GroupLayout.Alignment.BASELINE)
.addComponent(jLabel3, javax.swing.GroupLayout.PREFERRED_SIZE, 23, javax.swing.GroupLayout.PREFERRED_SIZE)
.addComponent(jTextFieldLN, javax.swing.GroupLayout.PREFERRED_SIZE, javax.swing.GroupLayout.DEFAULT_SIZE, javax.swing.GroupLayout.PREFERRED_SIZE))
.addGap(18, 18, 18)
.addGroup(layout.createParallelGroup(javax.swing.GroupLayout.Alignment.BASELINE)
.addComponent(jLabel4, javax.swing.GroupLayout.PREFERRED_SIZE, 23, javax.swing.GroupLayout.PREFERRED_SIZE)
.addComponent(jTextFieldAGE, javax.swing.GroupLayout.PREFERRED_SIZE, javax.swing.GroupLayout.DEFAULT_SIZE, javax.swing.GroupLayout.PREFERRED_SIZE))
.addPreferredGap(javax.swing.LayoutStyle.ComponentPlacement.RELATED, javax.swing.GroupLayout.DEFAULT_SIZE, Short.MAX_VALUE)
.addComponent(btnAddRow, javax.swing.GroupLayout.PREFERRED_SIZE, 35, javax.swing.GroupLayout.PREFERRED_SIZE)
.addGap(21, 21, 21))
.addGroup(javax.swing.GroupLayout.Alignment.TRAILING, layout.createSequentialGroup()
.addContainerGap(14, Short.MAX_VALUE)
.addComponent(jScrollPane1, javax.swing.GroupLayout.PREFERRED_SIZE, 260, javax.swing.GroupLayout.PREFERRED_SIZE)
.addContainerGap())
);
pack();
}// </editor-fold>
// button to add the row to the jtable
private void btnAddRowActionPerformed(java.awt.event.ActionEvent evt) {
// get the model from the jtable
DefaultTableModel model = (DefaultTableModel)jTable1.getModel();
// insert row to the model from jtextfields using addRow method
model.addRow(new Object[]{jTextFieldID.getText(), jTextFieldFN.getText(),
jTextFieldLN.getText(), jTextFieldAGE.getText()});
}
/**
* @param args the command line arguments
*/
public static void main(String args[]) {
try {
for (javax.swing.UIManager.LookAndFeelInfo info : javax.swing.UIManager.getInstalledLookAndFeels()) {
if ("Nimbus".equals(info.getName())) {
javax.swing.UIManager.setLookAndFeel(info.getClassName());
break;
}
}
} catch (ClassNotFoundException ex) {
java.util.logging.Logger.getLogger(Java_JTable_Add_Row_Using_TextBoxes.class.getName()).log(java.util.logging.Level.SEVERE, null, ex);
} catch (InstantiationException ex) {
java.util.logging.Logger.getLogger(Java_JTable_Add_Row_Using_TextBoxes.class.getName()).log(java.util.logging.Level.SEVERE, null, ex);
} catch (IllegalAccessException ex) {
java.util.logging.Logger.getLogger(Java_JTable_Add_Row_Using_TextBoxes.class.getName()).log(java.util.logging.Level.SEVERE, null, ex);
} catch (javax.swing.UnsupportedLookAndFeelException ex) {
java.util.logging.Logger.getLogger(Java_JTable_Add_Row_Using_TextBoxes.class.getName()).log(java.util.logging.Level.SEVERE, null, ex);
}
//</editor-fold>
/* Create and display the form */
java.awt.EventQueue.invokeLater(new Runnable() {
public void run() {
new Java_JTable_Add_Row_Using_TextBoxes().setVisible(true);
}
});
}
// Variables declaration - do not modify
private javax.swing.JButton btnAddRow;
private javax.swing.JLabel jLabel1;
private javax.swing.JLabel jLabel2;
private javax.swing.JLabel jLabel3;
private javax.swing.JLabel jLabel4;
private javax.swing.JScrollPane jScrollPane1;
private javax.swing.JTable jTable1;
private javax.swing.JTextField jTextFieldAGE;
private javax.swing.JTextField jTextFieldFN;
private javax.swing.JTextField jTextFieldID;
private javax.swing.JTextField jTextFieldLN;
// End of variables declaration
}
Another Source Code:
package JavaDB_001;
import java.awt.Color;
import java.awt.event.*;
import javax.swing.*;
import javax.swing.table.DefaultTableModel;
public class Work extends JFrame{
JTextField JT_fname,JT_lname,JT_age,JT_id;
JButton btn_add;
JTable table = new JTable();
JScrollPane pane;
Object[] cols = null;
public Work(){
JT_id = new JTextField(20);
JT_fname = new JTextField(20);
JT_lname = new JTextField(20);
JT_age = new JTextField(20);
JT_id.setBounds(130,20,150,20);
JT_fname.setBounds(130, 50, 150, 20);
JT_lname.setBounds(130, 80, 150, 20);
JT_age.setBounds(130, 110, 150, 20);
btn_add = new JButton("ADD");
btn_add.setBounds(300, 80, 100, 20);
cols = new String[]{"id","fname","lname","age"};
DefaultTableModel model = (DefaultTableModel) table.getModel();
model.setColumnIdentifiers(cols);
btn_add.addActionListener(new ActionListener() {
@Override
public void actionPerformed(ActionEvent e) {
model.addRow(new Object[]{
JT_id.getText(),JT_fname.getText(),
JT_lname.getText(),JT_age.getText()
});
}
});
pane = new JScrollPane(table);
pane.setBounds(100,150,300,300);
setLayout(null);
add(pane);
add(JT_id);
add(JT_fname);
add(JT_lname);
add(JT_age);
add(btn_add);
setDefaultCloseOperation(JFrame.EXIT_ON_CLOSE);
setVisible(true);
Color c = Color.decode("#bdb76b");
getContentPane().setBackground(c);
setLocationRelativeTo(null);
setSize(500,500);
}
public static void main(String[] args){
new Work();
}
}
